In this comprehensive guide, we will walk you through the process of activating the Accessibility Keyboard on your Mac, empowering you to navigate your computer with ease and efficiency.
Section 1: Accessing Accessibility Options
Before we dive into activating the Accessibility Keyboard, let’s first explore how to access the accessibility settings on your Mac:
- Click on the Apple menu located in the top-left corner of your screen.
- From the dropdown menu, select “System Settings.”
- In the System Preferences window, click on “Accessibility.”
- You will now find yourself in the Accessibility settings, where various features are available to enhance the usability of your Mac.
Section 2: Enabling the Accessibility Keyboard
To activate the Accessibility Keyboard and harness its power, follow these simple steps:
- In the Accessibility settings, navigate to the right sidebar (main window) and select “Keyboard.”
- In the main window, go to the “Accessibility Keyboard” area.
- Enable the toggle next to “Enable Accessibility Keyboard” to activate this feature.
- A small keyboard icon will appear on your screen, indicating that the Accessibility Keyboard is now enabled.
That’s pretty much it! You did it! For further customizations and options, continue reading this guide below:
Section 3: Customizing the Accessibility Keyboard
The Accessibility Keyboard offers several customization options to cater to your unique needs and preferences. Let’s explore how you can personalize this powerful tool:
- In the Accessibility Keyboard settings, you will find a range of customization options.
- Click on “Options” to access the available settings.
- Adjust the options based on your requirements. You can enable features like Sticky Keys, Slow Keys, and Mouse Keys, among others.
- Experiment with different settings to find the configuration that works best for you.
- Close the Accessibility Keyboard settings when you are satisfied with your changes.
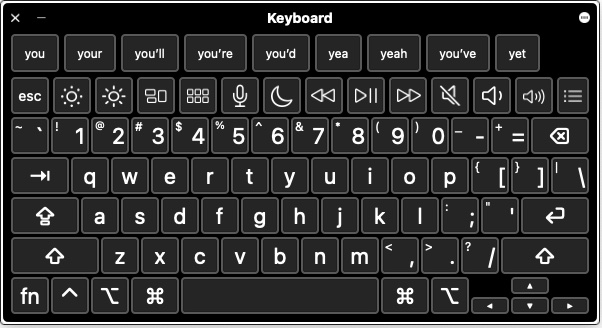
Section 4: Navigating the Accessibility Keyboard
Now that you have the Accessibility Keyboard activated, let’s familiarize ourselves with its functionalities:
- Click on the keyboard icon that appears on your screen to open the Accessibility Keyboard.
- The keyboard interface will provide you with a range of input options, including typing, mouse control, and assistive features.
- Use your mouse or trackpad to click on the desired keys on the virtual keyboard to input text.
- Explore the various buttons and functions available on the Accessibility Keyboard to navigate your Mac’s interface, perform gestures, or execute commands.
- Customize the appearance and behavior of the Accessibility Keyboard further by right-clicking on the keyboard icon and selecting “Preferences.”
Congratulations! If you followed these steps, you have successfully activated the Accessibility Keyboard on your Mac, opening up new possibilities for alternative input methods and assisting individuals with specific accessibility needs. By exploring the customization options and familiarizing yourself with the functionalities of the Accessibility Keyboard, you can tailor it to your specific requirements, optimizing your overall user experience.
Remember, the Accessibility Keyboard is designed to provide you with greater control, enabling you to navigate your Mac with ease and efficiency. Embrace its power and leverage its capabilities to enhance your productivity, regardless of your unique circumstances.
With the Accessibility Keyboard at your fingertips, your Mac becomes a more inclusive and accessible platform, empowering you to accomplish tasks, express yourself, and engage with the digital world in new and meaningful ways.
Leave a Reply